
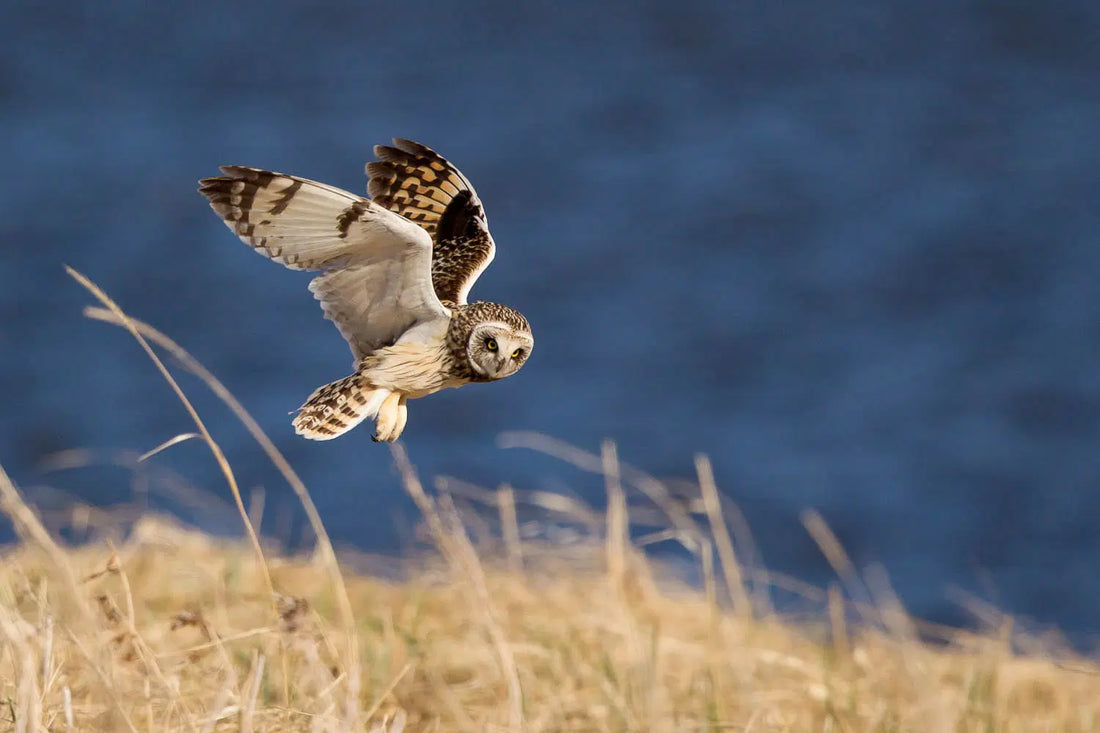
Owl Photography: How to Ethically Create Beauitful Images
This post contains affiliate links. If you use these links to buy something, I may earn a commission at no additional cost to you. I only recommend products I fully support or use myself. My full disclaimer
PIN THIS FOR LATER
Contents
If you ask most photographers who've just discovered the joy of birdwatching what they'd most like to photograph, odds are they'll all be hooting about one thing: "owls!"
Yep. Owls are the rock stars of bird photography, highly coveted and notoriously elusive. These gorgeous raptors of the night are the ultimate challenge for any wildlife photographer, me included.
I spent 15+ years as a professional wildlife photographer, and holy moly, owls are easily some of the toughest birds I've tried to photograph. There are so many species, each with its own challenges, and that keeps photographers on their toes.
So how do you get great owl photos without annoying the owls, or accidentally doing one of the no-no behaviors? Stick with me for the nitty-gritty, and by the end you'll have everything you need to photograph owls like a seasoned expert.

How to find owls to photograph
Owls draw a crowd. Seeing one is so exciting that people tend to overwhelm them, which is why most photographers know better than to reveal where they found their subject.
The owl paparazzi scene can be cutthroat, and neither you nor I want to be the reason one of these birds gets stressed out. Revealing an owl's location can disturb its natural behavior and its habitat, especially when people use lures like recorded calls or food.
In fact, many photographers who find an owl hold their photos for weeks or even months before posting. Why wait? To protect the owl from crowds of photographers stressing it.
How, then, do you find owls in your area without relying on the crowd? A bit of reading and networking goes a long way.

Photo: Ray Hennessy/Shutterstock
Finding owls to photograph starts with understanding each species' behavior, life cycle, and habitat preferences. Then you'll know where and when to look for the owls you most want to see.
Start with field guides
Field guides are an essential tool for any bird photographer. They cover physical characteristics and behavior. Even more important, they include range maps showing where the owls hang out.
Pick one that's visually engaging and up to date, with clear images of each species and close-up views of key features like the facial disk, wings, and plumage.
Which owls live near you? Study the range maps to find out.
Then get to know your targets by focusing on these details:
- Feather coloration, so you know each owl by its shades.
- Ear tufts. Does the species have those adorable tufts, or not?
- Roosting spots: where do they like to chill during the day?
- Habitat. Is it a woodland lover or an open field fan?
- Diet, meaning what they're snacking on.
For example, short-eared owls might be active during the day (bonus!), barred owls might perch lower in trees than you'd expect, snowy owls might hit the beach when they migrate, and great horned owls are freeloaders who squat in nests built by hawks.
Do your homework. Soak up everything you can about the behavior and lifestyle of the owls you're after.
The Cornell Lab of Ornithology's Birds of the World is another incredible online resource. It has in-depth information about each owl species, plus recordings of their vocalizations, which help when you're birding by ear.

Photo: kodec/Shutterstock
Get skilled at spotting sign and you'll photograph owls far more often. Owl pellets like this one are an exciting clue to find in the field.
Learn to spot owl sign
To photograph owls successfully, you need to become an expert at spotting their sign in the landscape.
Look for pellets
Keep an eye out for pellets, those lovely regurgitated bundles of bones and fur from an owl's prey, because owls, tidy diners that they are, spit these out near their roosting areas.
Round or oval nuggets on the ground? Good clue. You're probably in the right spot.
Spot the whitewash
Whitewash is less charming but just as important. It's owl poop, plain and simple, and you'll see the white splatter on trees, rocks, and other surfaces beneath their roosting areas.
Think of it as nature's not-so-subtle signpost, pointing you toward your owl.
Study owl behavior
Learn the body language and behavior of each owl species, too. What does that owl look like when it's chilling out, ready to pounce on prey, or feeling a bit freaked out?
Learn owl body language
Reading an owl's behavior helps you predict the key moments for compelling photos, and it also tells you when YOU are the one stressing the owl, so you can adjust.
- Relaxed: fluffy feathers, half-closed eyes, and a generally chill vibe.
- Alert for hunting: upright posture, an intense stare, and ear tufts that may stand at attention.
- Nervous or stressed: flattened feathers, wide eyes, and shifting from foot to foot.
Listen to the local birds
Other birds can help you, too. Smaller birds tend to lose their minds when an owl is nearby, often swooping down to attack it. That behavior is called "mobbing."
Hear a sudden racket from the small birds? That's your cue an owl may be close. Follow the noise, and you might find yourself face-to-face with an owl.
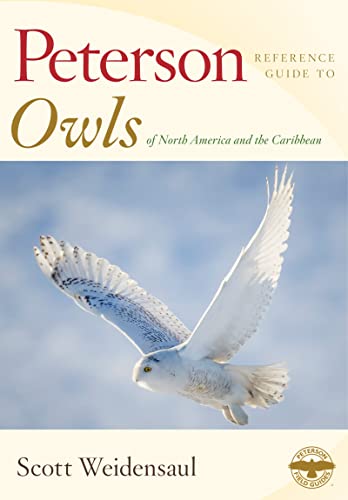
Learn a whole lot more about owls from these fab books:
 |
 |
 |
 |
 |

Photo: Danita Delimont/Shutterstock
Owls are masters of camouflage, as this owl tucked into a tree cavity shows. Once you know which landscape features to look for, though, you'll zero in on even the best-hidden owls.
Birding apps, forums, and online birding communities
There are plenty of birding groups and forums on Facebook and other social platforms, and some local groups even run WhatsApp chats or private forums where members share location information.
Join birding groups and forums
Research the groups in your area and lurk for a while to see how members behave. Does a group broadcast sensitive location information to large numbers of people? Avoid it.
You're looking for the tight-knit communities where information is shared responsibly.
Birders and bird photographers don't always get along, and for fair enough reasons. Plenty of bad actors in the photography world put the photo before the owl's safety, and they ruin it for ethical photographers. Yuck.
When you join the conversation, show that you're a bird-welfare-comes-first kind of bird photographer. (I know you are!)
Check out eBird (with a grain of salt)
eBird, the sighting-list site run by the Cornell Lab of Ornithology, no longer publishes exact locations for some species. Its range maps can give you an idea of where owls are. Precise directions? You won't find them. It's a treasure hunt with fewer X-marks-the-spot moments.
Network and build trust
Join local birdwatching groups and Bird Alliance (Audubon) chapters, and get to know the fellow shutterbugs you meet there.
But know this. Ask someone point-blank where they shot an owl photo, and they're unlikely to tell you, especially if you ask on a public forum.
You need to prove you're trustworthy and ethical before anyone shares location information.
For most of us, the fun of wildlife photography is in the search itself. Finding your subjects on your own is rewarding, and it gives you a great story to tell when you finally capture that perfect owl shot.

Photo: Ray Hennessy/Shutterstock
Close-ups are tempting, but there's beauty in photographing an owl in its habitat. With this burrowing owl at the far left of the frame, you get a great sense of its grassy home. Experiment with shots that frame your subject small in its environment.

Techniques for great owl photos in the field
What does a great owl photo take? Patience, preparation, and a touch of finesse.
1. Use a telephoto lens
First things first: get yourself a long lens. It's your owl photography superpower.
- The whole goal is to photograph the owl without disturbing it. Wake a snoozing owl, or make it puff up like a feathered balloon, and you're doing it wrong. A telephoto lens lets you stay far enough away to keep your owl zen.
- A long lens also isolates your subject. Owls love hiding against chaotic backgrounds like branches or grasses, and a telephoto cuts through the clutter so the owl is the star of the show. Look for at least 300mm of focal length. Popular choices include the Canon EF 100-400mm and the Nikon AF-S 200-500mm, which give you the reach you need without getting too close.
- Then there's low light. Owls are nightlife aficionados, and prime telephoto lenses, with their wide apertures, are perfect for twilight and moonlit moments. An aperture of f/2.8 to f/4 is ideal because it lets in more light.

Photo: Marek Rybar/Shutterstock
A photography blind lets you get closer to your subject without disturbing it. Spending time in an area with owl activity? Set up a pop-up blind and wait patiently, and you'll be that much more likely to photograph cool behaviors like hunting or preening.
2. Use a photography blind
Want to go full stealth mode? Invest in a photography blind.
- A pop-up blind is your portable owl-watching HQ. Owls won't even know you're there, so you can photograph them at their most candid. Set it up in a spot where owls are known to hunt or roost, and your chances of a successful shoot go up.
- Blinds also shield you from the elements. Rain or shine, you stay comfy and dry, so you'll be less tempted to leave early when the weather turns.
- For gear, check out Tragopan Photography Blinds. They're co-designed by wildlife photography legend Gerrit Vyn and top-notch for owl stalking. The Tragopan Grouse V+ is a great starter blind, easy to set up and carry.

3. Understand owl behavior
Why does behavior matter so much? It tells you what the owl is about to do.
- Learn the body language. A relaxed owl looks pretty chill, while an alert one is all eyes and ears, ready to pounce. If it puffs up and extends a wing, it's telling you to back off. Reading these signs helps you predict its actions and capture the key moments.
- Then pay attention to the neighborhood watch. Smaller birds love to mob owls, and the racket they make can guide you to your elusive subject. Mobbing birds work like an alarm system, telling you a predator is nearby.
4. Scout and stake out
Patience is key. Pick a promising spot and settle in.
- Owls are creatures of habit. Note where they hunt and where they like to perch, because that's how you anticipate their movements, and the time you spend watching will pay off when you're setting up for a shoot.
- Then wait quietly. Sit still, stay silent, and let the owl come to you. You'll capture a range of natural behaviors this way. Bring a comfortable chair, dress warmly, and be prepared to wait.
5. Use creative lighting
Dawn and dusk are your magic hours.
- Backlighting. Use the low sun to your advantage: position yourself with the sun behind the owl, and you can get dramatic silhouettes rimmed with golden light.
- Low-key and high-key photos. Low-key lighting gives you dramatic, moody shots that play up an owl's intense gaze. High-key goes bright and airy, with a soft, ethereal feel. Play around and see what works best.
6. Focus on composition
What turns a decent photo into a great one? Good composition.
- Try the rule of thirds. Imagine your frame divided into nine equal parts by two horizontal and two vertical lines, then place the owl along a line or at an intersection. Off-center makes for a more balanced, engaging composition.
- Play with depth of field. A wide aperture blurs the background so your owl pops against its natural habitat. That effect is called bokeh, and it adds a professional touch. Experiment with different aperture settings to see what gives you the best results.
7. Practice ethical photography
Respect the owls and their environment. Always.
- Keep disturbance to a minimum. Don't get too close or make loud noises, and use your telephoto lens to keep a respectful distance. Is the owl acting differently because of you? Time to back off.
- Share your photos responsibly. Leave out exact locations to protect the owls from overzealous photographers. Something vague like "a forest in Oregon" works just fine.

Photo: Ray Hennessy/Shutterstock
Dawn and dusk are exciting times to photograph owls, with chances to play with backlight and side light. Experiment with underexposing to get silhouettes rimmed with gold.

Camera settings for owl photography
In position? Time to dial in the camera settings that suit owls.
1. Get comfortable with high ISO
Owls are the night owls of, well, the night. They're most active at dawn, dusk, and through the darker hours.
- Be prepared to shoot at a higher ISO than you normally would, as high as your camera can handle before the noise gets bad. Modern cameras are pretty good at high ISOs, so don't be afraid to crank it up. A good rule of thumb: start around ISO 3200 and adjust as needed.
- A tripod or monopod is a lifesaver in low light. Owls can stay still for long periods, so on a tripod you can use slower shutter speeds and keep your ISO lower.
- Expose to the right (ETTR). That means pushing your exposure toward the right side of the histogram without overexposing, which keeps detail in the shadows and reduces noise. Keep checking your histogram to make sure the exposure is right.
2. Use your widest aperture
Got a fast lens (f/4 or f/2.8)? Take advantage of it.
- Opening up to the widest aperture lets in more light, so you can use a lower ISO. That matters a lot in low light.
- A wide aperture also gives you a shallow depth of field. With owls, that works in your favor, thanks to their disk-shaped faces. Focus on the eyes for compelling, sharp portraits that draw viewers in.
3. Play with slow shutter speeds
When the light fades, get creative with your shutter speed.
- Too dark for fast shutter speeds? Try slowing down. For flight photos, you might need to go as slow as 1/1000 or even 1/800. For an artistic blur, experiment with 1/30 of a second, which can create beautiful motion effects.
- For most birds in flight, start at 1/2000. Depending on the light and the effect you want, you can go down to 1/1600 or 1/1000. Owls fly slowly and gracefully, which makes them perfect subjects for slower speeds.
4. Remote trigger and tripod
Another option is to set your camera on a tripod and fire it with a remote trigger while you stand farther away.
- A remote trigger keeps disturbance to a minimum and keeps you out of the owl's view.
- The tripod adds stability, which helps with long exposure times and high ISO settings. It also lets you relax and wait for the perfect moment without holding the camera the whole time.
Whatever keeps the owls safe should be your number one choice.

Photo: Kersti Lindstrom/Shutterstock
Great gray owls are an exciting species to photograph, and watching one hunt quietly over a snowy field is exhilarating. Be patient and you'll be rewarded with an owl swooping by, or landing on the perfect perch for a portrait.
What to avoid when photographing owls (and why it matters)
Every kind of wildlife photography should be done ethically, but owls seem especially vulnerable to bad outcomes when people behave badly.
Ideally, you never interfere with any creature's natural behavior. For us, it's just a photograph. For them, it can mean the difference between life and death.
1. Never bait an owl with live or dead prey
An owl that gets used to being fed by humans is compromised, like any creature. It may come to depend on people for meals, or try to get closer to them, and that can turn deadly.
- Fed owls can come to depend on humans, which changes their natural hunting behavior and puts them at risk. A friend of mine once joined a workshop to photograph snowy owls without realizing they would be baiting the owls. Once she understood the cruelty of buying pet mice to toss out as food, she felt terrible. Don't make the same mistake.
- See a workshop that guarantees great owl action shots? Ask if they bait the owls. If they do, don't book. Always choose tours and workshops that put ethical wildlife photography first.
2. Avoid using recorded calls
Some people use their phones to play calls that might bring an owl to them. If you care about birds, skip it.
- Owls use their vocalizations to find out who's in the area, like an enemy or a potential mate. A recorded call can raise an owl's stress or distract it from hunting, because it will investigate the sound and waste precious energy and time.
- Do your research instead, and spend your time looking in the right places. Listen to recordings at home to learn the calls, but leave them there. Patience and stealth will get you close-up photos without disrupting the owls.

Photo: Jaymi Heimbuch
Found an owl actively hunting? Pause and watch for patterns you can take advantage of. A short-eared owl, for instance, may fly back and forth over the same area looking for a meal. Notice the flight pattern and you can get into position for great shots without disturbing the hunt.
3. Avoid photographer jams
An owl can bring photographers out in droves, especially when it's an unusual sighting, like migrating snowy owls.
- Too many people make it harder for the owl to hunt or rest. Photographer jams can also habituate an owl to people, which makes it less wary of dangers like road traffic.
-
Instead, connect with private property owners who have owls on their land and ask for access permission. Then you can enjoy watching and photographing owls without worrying about crowds.
When you find an owl actively hunting, pause and watch for patterns you can use.
A short-eared owl may fly back and forth over the same area, for instance, which lets you position yourself for great shots without disturbing the hunt.


Photo: Fine Art Photos/Shutterstock
Burrowing owls are great to photograph because they're often active during the day. Keep your distance and you'll be rewarded with relaxed subjects and fantastic behavior shots, like this burrowing owl parent feeding its young.
4. Avoid flash photography
Why skip the flash? It can affect owls in several ways that put the bird's safety at risk.
- A flash can stress an owl, startle it, and disrupt its normal behavior. In low light, a bright burst may also scare away potential prey or attract predators.
- Treat this "limitation" as a chance to get creative, and explore other photo technologies like infrared. Morgan Heim’s story about northern spotted owls was photographed entirely in infrared, capturing natural moments in near darkness without a flash.
5. Be extremely careful when photographing nests
Lucky enough to find an owl nest? Never reveal the location, and be very careful anywhere nearby. The owls' safety and well-being come first.
- Young birds are vulnerable, and it's easy to scare off a hard-working parent carrying a meal that means the difference between life and death.
- Use a long lens to photograph nests from afar, which minimizes disturbance and keeps you out of the owls' space. If you decide to approach, do it quietly and use natural cover to stay hidden. Is the parent owl agitated? Back away immediately. And never use a drone near a nest. Owls perceive drones as predators, and the stress can cause them to abandon the nest.
It's common for fledgling owls to end up on the ground while they're learning to fly. Come across one? Back away and watch from a distance. Fledglings will often climb back up to a safe perch.

Photo: Ray Hennessy/Shutterstock
Awkward but adorable. It's an absolute joy to watch young owls figure out the world around them. Near a nest, though, stay extra aware of your behavior so you don't disturb them.
6. Don't overstay your welcome
When you see your first owl, it's tempting to stay too long, though if you're in a blind or standing quietly in one spot, staying a while might be okay.
Constantly jockeying for a better, closer shot? Then odds are you're stressing the owl.
- Lingering can disrupt the owl's natural behavior and alert other birds to its presence. It can also make the owl miss hunting opportunities.
- Everyone loves a good close-up. Still, consider stepping back and taking wider-angle photos that show the owl in its environment. With today's high-megapixel cameras, you can crop a wider shot down to the tight image you want.


Photo: Jaymi Heimbuch
With an owl in flight, it's easy to focus on the wings by accident instead of the head. Use a single autofocus point, or single-point plus assist, for more control over exactly where your camera focuses, so you get a tack-sharp eye.
You've finally nailed that perfect owl shot, and you're itching to share it with the world. Hold your horses! Before you hit "post," make sure you aren't putting the owl at risk.
1. Strip location data from your photos
I can't stress this enough: don't share location information. Your camera can save GPS coordinates in each photo's EXIF data (the hidden details stored with the file). Leave them in, and you might unwittingly share the owl's exact location with everyone. Big no-no.
- First, turn off GPS in your camera settings, so location data never gets attached to your photos.
- Forgot? You can still strip the location data with software like Lightroom. Open the image in Library mode, check the metadata, and remove the location info before you export images for social media or your website.
2. Delay posting your photos
It's tempting to share your amazing owl photo right away, but sometimes it's better to wait, because a delay can protect the owls from a sudden influx of curious visitors.
- I often wait months before posting my owl photos, so the owls aren't disturbed by people flocking to the site.
- Think of the owls. What's just a photo to you can be a matter of life or death for them. When too many people know their location, the owls face stress and harassment while they're just trying to survive.
I know, I know… you really want to show people what you shot. And you should! You worked hard to make it.
Just remember the birds on the other side of that post, who can get stressed or harassed when too many people come looking. Take your time, share thoughtfully, and everyone benefits, owls included.

Photo: Jaymi Heimbuch
Found a burrowing owl? Then you've likely found its burrow too, so be extra respectful of its space. If you're careful and don't cause it to abandon its home, you'll be able to photograph it for hours, or even weeks, on end!
Why owls are amazing wildlife conservation ambassadors
Their cool disk-shaped faces and uncanny ability to turn their heads 270 degrees make owls compelling to photograph. There's more to them than looks, though.
Owls are indicator species, which means they alert us to the health of an environment. Are owls declining somewhere? That's a sign of bigger environmental issues, like habitat loss and dwindling food sources.
- Think of owls as nature's health inspectors. Their presence (or absence) can tell us a lot about the state of an ecosystem.
- They're also fantastic ambassadors for teaching people about nature and inspiring them to care. Take the northern spotted owl in the Pacific Northwest. Its decline due to logging sparked major environmental efforts, and even though logging has decreased in many areas, the spotted owl now faces threats from barred owls moving in.

Photo: Jaymi Heimbuch
Even common species like barred owls are thrilling to find and photograph. Something about them stands out from other raptors. Photographing owls is a joy, and so is simply watching them live their extraordinary lives.
Final thoughts
Photographing owls is an incredible adventure that brings you closer to nature. Remember, though, that great photos come with great responsibility.
Keep it ethical. Strip location data, avoid baiting and recorded calls, steer clear of photographer jams, and respect the owls' space.
Remember, too, that owls are conservation ambassadors, showing us the health of our ecosystems. A great horned owl at dusk or a burrowing owl's curious stare: whatever you're capturing, your actions matter.
So gear up, be patient, and always put the owls' well-being first. Share your photos thoughtfully and set an example for others. Happy shooting!
🦉 Love owls? Browse the Owls collection for original owl shirts, owl mugs, owl stickers, and owl gifts featuring Barn Owls, Great Horned Owls, Snowy Owls, and more.



How to share your owl photos on social media